Screen recording offers significant value whether your needs are for creating online training lessons, showing customers software features, or documenting video conferences for team building. Without the appropriate solution, however, organizing massive data and setting up excellent capture might be difficult. That is where ioCloud finds application. Their fully-functional screen recording system lets users concentrate on their material by removing all technological difficulty. Anyone may quickly begin filming with ioCloud simply a few clicks. Everything is safely housed on the cloud so that collected materials are always available wherever.
The following sections will cover the basics of setting up a first screen recording, optimizing settings for varied needs, and exploring popular use cases. Best practices for producing high-quality recordings to enhance the user experience will also be shared. By the end, users will confidently be able to create and share captured content to further their goals. Let's begin with a quick tour of ioCloud's simple yet powerful recording features. Deeper insights into each section will then be provided. There is excitement to help unlock the possibilities of screen recording.
Screen recording is a useful tool. It allows capturing what happens on a computer screen. This can be helpful in many ways. Recording your screen makes it easy to demonstrate processes. You can show how to do tasks like using software or fixing issues. This helps teach others. Screen recordings are great for making tutorials.
Screen recording is also good for troubleshooting. If something goes wrong on a computer, a screen recording can show exactly what happened. This allows figuring out what caused problems. It's like taking a video of the screen's actions. Meetings and collaborative work also benefit from screen sharing. Through recording, multiple people can review a session afterwards. No need to reconstruct discussions from memory. The video archives everything shown on the screen.
For businesses, screen recording enables employee training. New hires can watch recordings to learn tasks at their own pace. This saves time compared to explanations. Recordings are reusable, so they train many people over time.
ioCloud offers many powerful features that make it a very useful platform for screen recording and content management. Here are some of the key features:
Also Read: Enhancing Team Efficiency with ioFlow's Status-Based Workflow Management
With the basics down, let's look at some popular uses for screen recordings:
The possibilities are endless! Try integrating recordings into your existing workflows wherever demonstration adds value over static instructions. With ioCloud, it's simple to create high-quality captured content.
Following some best practices will result in even better screen recordings:
Keeping these in mind will result in high-quality, user-friendly screen recordings that effectively achieve your goals. Experiment and find what works best for your workflow and content needs.
Screen recording is a useful tool for tutorials, collaborations and sharing your expertise. Here are the key steps to creating efficient screen recordings using ioCloud's advanced platform:
Step 1- Go to the “Log in” section on ioMoVo’s home page
Go to the "Log in" section on ioMoVo’s homepage. Signing into your free account simplifies accessing and managing all your recordings.
Step 2- Sign in with your e-mail address
Sign in with your email address. Once logged in, you'll be directed to your personal dashboard for controlling recordings.
Step 3- Click on the Record Video Button
Click on the "Record Video" button to initiate a new recording session. This takes you to the recording screen with options to customize.
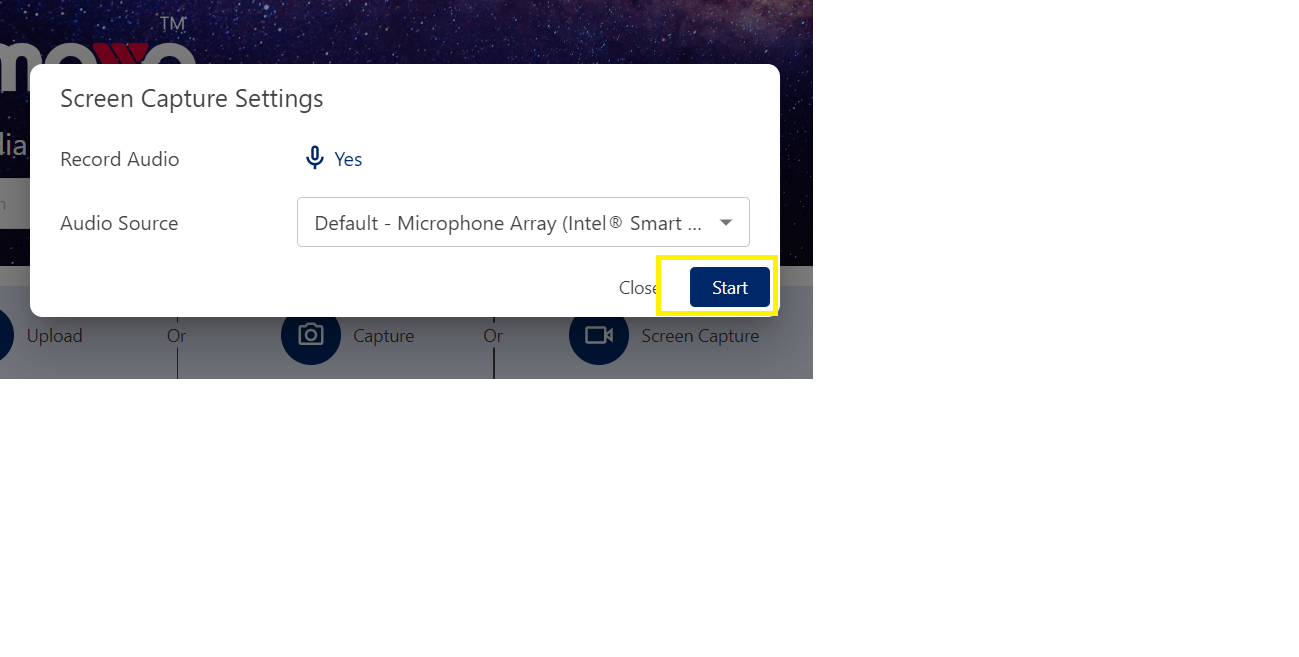
Step 4- Click on the Start button to start your recording
Click on the "Start" button to begin capturing your screen and audio. Consider doing a test recording to check settings.
Step 5- Select the screen you want to record and press share to start.
Select the specific screen you want to share such as an active application or entire desktop. Then click "Share" to commence recording.
Step 6- Stop sharing when you are done.
When finished demonstrating, click "Stop Sharing" to end the capture session. ioMoVo automatically saves the file.
Step 7- Your file will be saved automatically
Your compressed recording file is now securely saved and ready to instantly share via link from your dashboard library. No file size limits foster efficient sharing of knowledge.
We've now reached the end of this comprehensive guide on efficiently recording screens with ioCloud. It is hoped that this blog post has equipped users with the knowledge to begin capturing valuable content. Screen recording truly is a versatile tool when used strategically. To briefly recap, the blog post explored how ioCloud streamlines the entire process from setup to editing. Their user-friendly platform makes recording one's desktop as simple as a couple clicks. Settings were also customized to optimize quality versus file size for different use cases. Understanding resolutions, frame rates, and more allows for creating the right configuration.
Some popular applications like tutorials, product demos, trainings and collaborative replay were reviewed. But the opportunities are endless - get creative with how recordings are incorporated wherever visuals add value. Following tested best practices ensures content is professional and user-friendly. Whether just getting started or an experienced creator, continuing to practice and experiment will improve captured media over time. It should also be remembered that ioCloud offers robust editing and collaboration tools. Leverage the full suite of features as needs evolve.